The Ultimate Guide to Permanent Makeup
Waking Up Beautiful Every Day
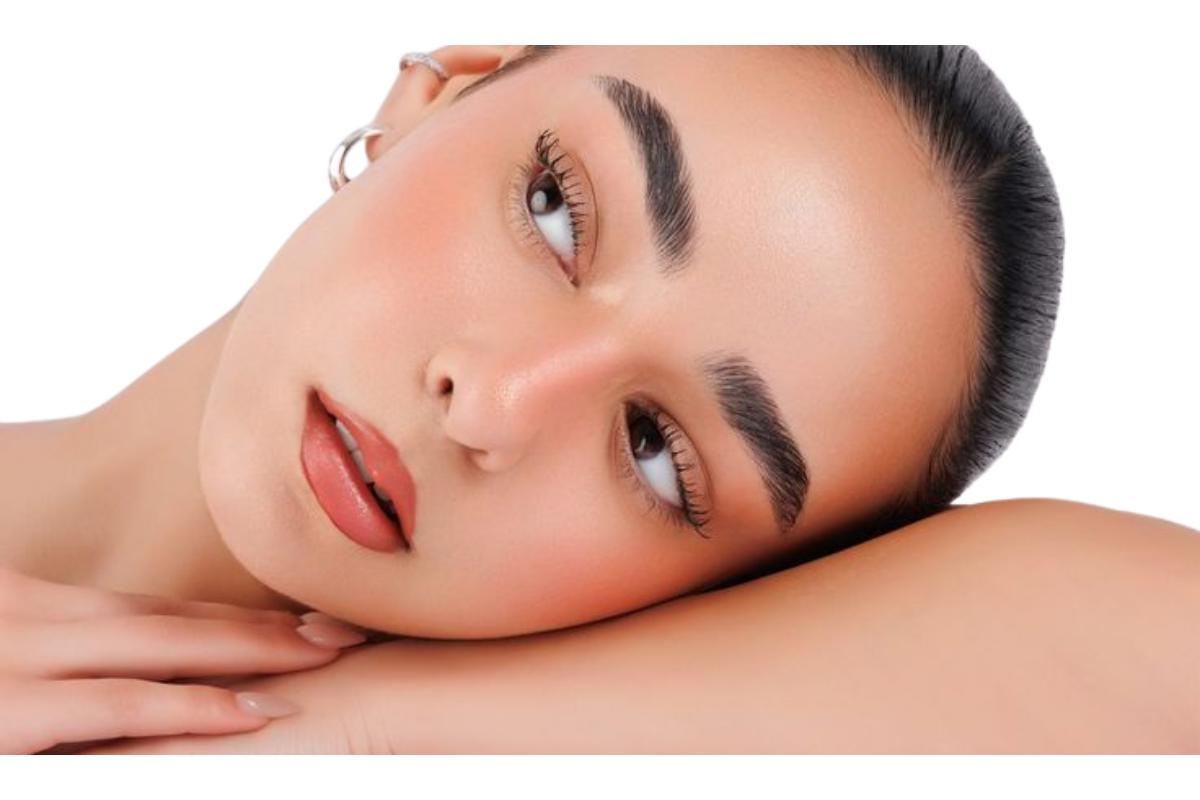
Imagine waking up with perfect eyebrows, defined eyes, and rosy lips without touching a single makeup brush. That's what permanent makeup promises!
What is Permanent Makeup?
Permanent makeup is also called micropigmentation, cosmetic tattooing, or dermapigmentation. It works by putting special colored pigments (like tiny drops of ink) into the top layer of your skin using very fine needles. Think of it like drawing on your skin, but the drawing stays for a long time.
Is It Really Permanent?
Not exactly! Modern permanent makeup is actually semi-permanent. This means it lasts for 1 to 5 years before it slowly fades away. This is actually good news because:
- Your face changes as you get older
- Makeup trends change (what looks good today might look old-fashioned in 10 years)
- You can try new styles when the old one fades
Popular Permanent Makeup Procedures
Eyebrow Enhancements
Microblading: This technique creates tiny hair-like lines that look just like real eyebrow hairs. Perfect for people who want natural-looking brows.
Powder Brows (Ombré): This gives you soft, shaded eyebrows that look like you filled them in with powder. Great for a fuller, bolder look.
Eyeliner & Eyeshadow
You can get:
- Subtle lash-line enhancement (makes your lashes look thicker)
- Dramatic winged liners (like a cat-eye that never smudges)
- Permanent eyeshadow for a soft, colored look
Lip Blushing
This adds a gentle wash of color to your lips or creates a full lipstick look. It can also make your lips look more defined and shapely without using fillers.
Trendy Touches
Some people get permanent freckles or beauty marks (like the famous spot above Marilyn Monroe's lip).
Medical and Restorative Uses
Permanent makeup isn't just for beauty—it helps people too!
Restorative Procedures:
- Areola restoration for people who had breast surgery
- Scar camouflage to hide burns or surgical scars
Medical Solutions:
- Helps people with alopecia (hair loss) or vitiligo (skin color loss)
- Assists people with vision problems or shaky hands (from Parkinson's or arthritis) who can't apply regular makeup
What Does the Procedure Feel Like?
Let's be honest about pain. Most people say permanent makeup feels like:
- Scratching or light scraping
- Similar to eyebrow threading or waxing
- A tingling or vibrating sensation
It's not painless, but it's not unbearable either. Most artists use numbing cream to make you comfortable.
The Procedure Journey: Step by Step
Step 1: Consultation & Design (30-60 minutes)
Your artist will:
- Draw the shape on your skin with a pencil
- Make sure both sides match perfectly
- Choose colors that match your skin tone and hair color
- Test pigments on your skin to see how they look
Step 2: Numbing (15-20 minutes)
A topical anesthetic (numbing cream) is applied to reduce discomfort.
Step 3: The Application (1-3 hours)
The artist carefully applies the pigment. You might hear a buzzing sound from the machine.
Step 4: Healing Timeline
Day 1-2: The area looks very dark and bold (don't panic—this is normal!)
Day 3-7: Scabbing and flaking begin. The color looks patchy. Do not pick at it!
Week 2: Most scabs are gone. The color looks lighter than expected.
Week 3-4: The "true color" starts appearing as skin heals completely.
Week 6-8: Touch-up appointment to perfect any uneven spots.
Understanding Color Changes
Sometimes permanent makeup changes color over time:
Why does this happen?
- Sun exposure breaks down pigments
- Body's immune system slowly removes ink particles
- Low-quality pigments have unstable ingredients
Common color shifts:
- Black eyeliner → Blue-gray
- Brown eyebrows → Reddish or orange
- Lip color → Pink or purple tones
Prevention: Use sunscreen daily and choose experienced artists who use high-quality pigments.
Choosing the Right Colors
Your artist should consider:
- Skin undertone (warm, cool, or neutral)
- Natural hair and eye color
- How colors heal on different skin types
- Patch testing if you have sensitive skin
Darker skin tones need different pigment formulas than lighter skin. A good artist knows this!
Cost and Maintenance
Initial Investment
- Eyebrows: $400 - $1,500
- Eyeliner: $300 - $1,000
- Lips: $500 - $3,500
- Beauty marks: $100 - $300
Prices vary based on:
- Artist's experience and reputation
- Your location (cities cost more)
- Complexity of the design
Maintenance
Touch-ups are needed every 12-18 months because:
- Sun exposure fades pigments
- Oily skin breaks down color faster
- Natural cell turnover pushes pigment out
Safety and Risks
Potential Problems
Infections: Can happen if needles aren't sterile or aftercare isn't followed properly.
Allergic Reactions: Some people react to certain pigment ingredients. Red pigments cause reactions most often.
Pigment Migration: The ink can blur or spread over time, making lines look fuzzy.
Granulomas: Small bumps that form around pigment particles.
MRI Concerns: Some pigments contain metal particles that can cause burning or interfere with MRI scans. Always tell your doctor about permanent makeup before getting an MRI.
Who Should NOT Get Permanent Makeup?
- Pregnant or breastfeeding women
- People with active skin infections, eczema, or psoriasis in the treatment area
- Those undergoing chemotherapy or radiation
- People with certain autoimmune conditions
- Anyone with keloid scarring tendency
Always consult your doctor first if you have health conditions!
Red Flags: Warning Signs of Bad Artists
Avoid artists who:
- Work from home without proper licensing
- Don't wear gloves or use single-use needles
- Have no portfolio or before-after photos
- Pressure you to decide immediately
- Offer prices that seem "too good to be true"
- Don't ask about your medical history
- Work in dirty or cluttered spaces
Trust your gut—if something feels wrong, leave!
Preparation Rules
24-48 Hours Before:
- No alcohol (thins your blood)
- No caffeine (makes you jittery)
- Avoid blood thinners like aspirin or ibuprofen
- Stop using retinoids and Vitamin C on the area
- Get good sleep and eat a meal before your appointment
Aftercare: The First 14 Days
First 24-48 Hours
- Keep the area dry and clean
- Gently blot (don't rub) if needed
- Apply healing ointment as directed
- No makeup on the treated area
- Sleep on your back to avoid rubbing
Days 3-14
- Continue gentle cleaning
- Don't pick scabs (this removes pigment!)
- No swimming pools, hot tubs, or saunas
- No heavy sweating or gym workouts
- Avoid direct sunlight
- No makeup on the area until fully healed
Long-Term Care
- Apply SPF 30+ sunscreen daily
- Avoid harsh exfoliants on the area
- Don't use tanning beds
- Schedule touch-ups as recommended
Removal: If You Change Your Mind
If you don't like your permanent makeup, you have options:
Laser Removal: Uses light energy to break down pigment particles. Usually takes 3-10 sessions. Can be expensive ($200-500 per session).
Saline Removal: A salt solution draws pigment out. Gentler than laser but takes longer.
Surgical Removal: Rare, only for extreme cases.
Important: Removal is harder and more expensive than the original procedure. Choose your artist carefully from the start!
Realistic Expectations
Permanent makeup will NOT:
- Look exactly like a professional makeup application
- Stay perfect forever without touch-ups
- Heal exactly the same on everyone
- Look identical to photos you saw online
Permanent makeup WILL:
- Save you time getting ready
- Give you a polished look 24/7
- Enhance your natural features
- Require patience during healing
- Need maintenance to stay fresh
Choosing the Right Professional: Your Checklist
Research Steps
1. Check Credentials:
- Valid license (requirements vary by state/country)
- Insurance coverage
- Certifications from recognized training programs
2. Review Portfolio:
- Look at healed photos (not just fresh work)
- Check for consistency in their work
- Find people with your skin tone and features
- Read client reviews on multiple platforms
3. Studio Visit:
- Is it clean and organized?
- Do they use sterilized, single-use needles?
- Are pigments from reputable brands?
- Do they answer all your questions patiently?
4. Consultation Questions to Ask:
- How long have you been doing this?
- What's your training background?
- What pigment brands do you use and why?
- What's your aftercare protocol?
- Do you offer free touch-ups?
- What happens if I'm not happy with results?
Green Flags (Good Signs!)
- Artist asks about your medical history
- They show you sterilization procedures
- They're honest about what will and won't work for you
- They don't rush you
- Previous clients have good things to say
- Studio follows local health regulations
Final Thoughts
Permanent makeup can be life-changing for the right person. It saves time, boosts confidence, and helps people who struggle with traditional makeup. But it's not magic—it requires:
- Research to find a skilled artist
- Realistic expectations about results
- Commitment to proper aftercare
- Financial investment for quality work
- Patience during the healing process
Take your time making this decision. Talk to multiple artists. Ask lots of questions. And remember: good permanent makeup should enhance your natural beauty, not change who you are.
When done right, permanent makeup lets you wake up feeling confident and ready to face the day—no makeup bag required!
Medical Disclaimer: This guide is for educational purposes only. Always consult with a licensed healthcare provider before getting any cosmetic procedure, especially if you have health conditions or take medications.